Family, Food

Pasta Primavera

Vegetables

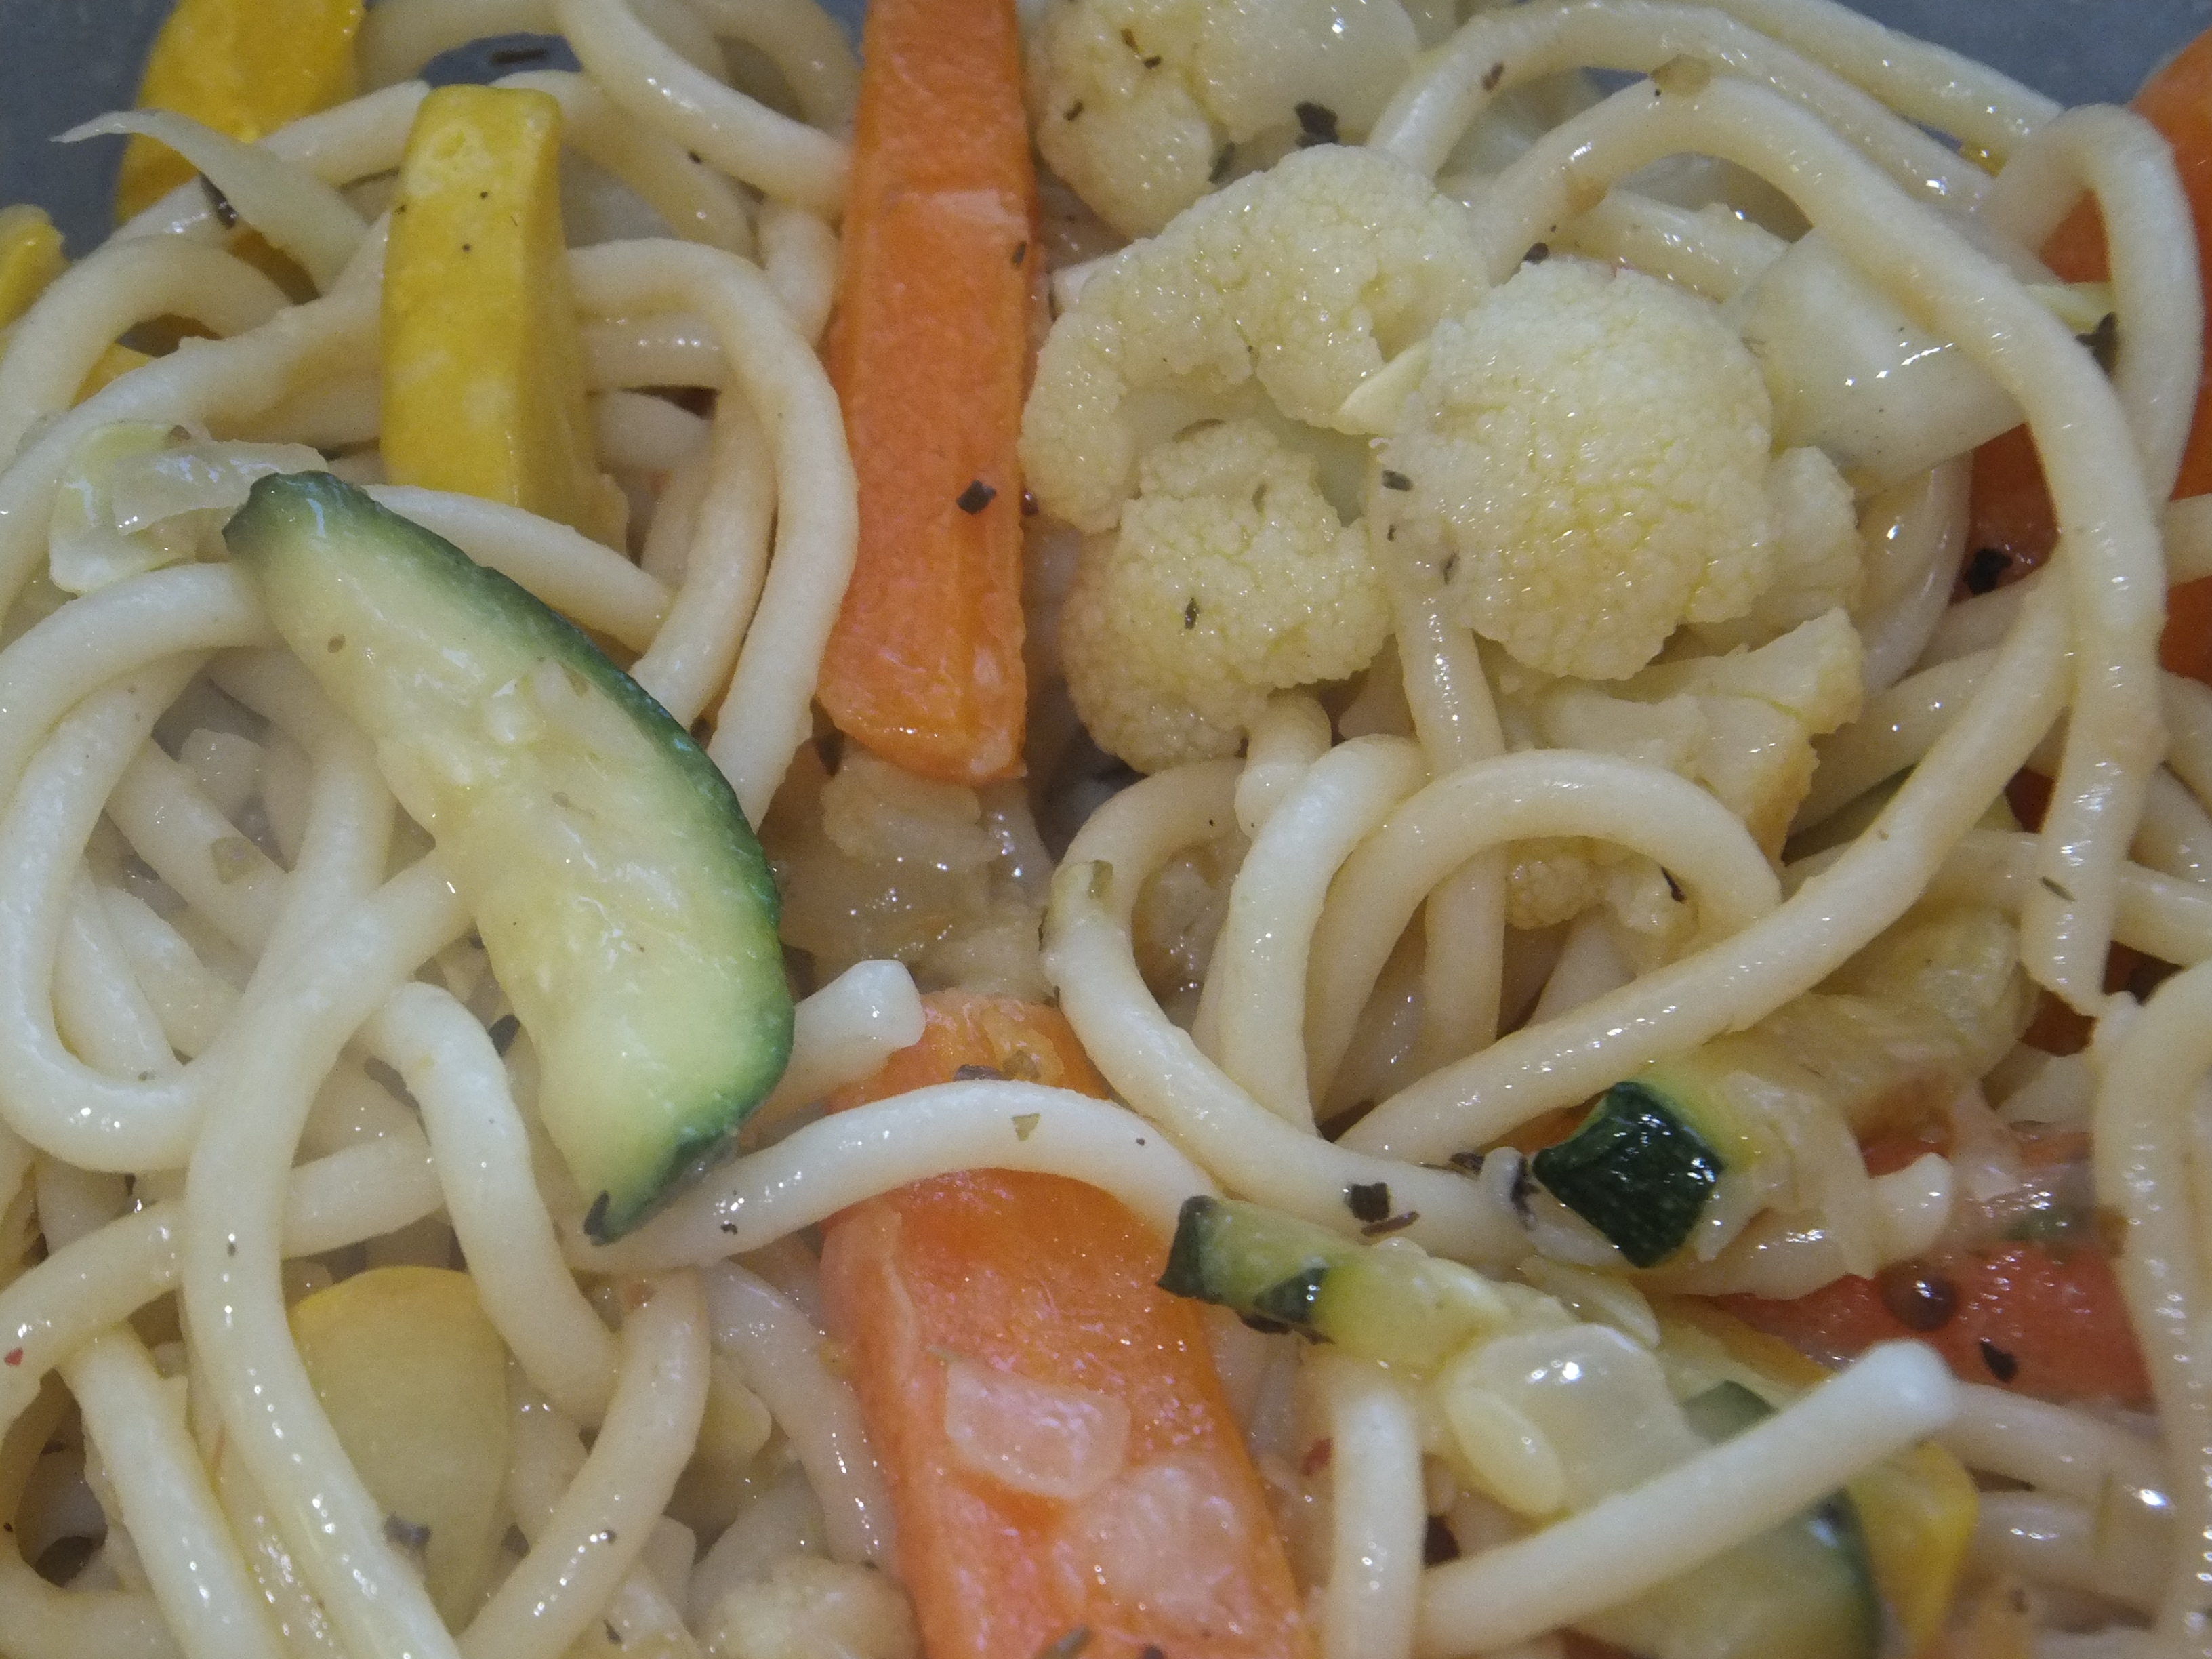
It’s Friday folks so that means no meat for us so I wanted to share another quick meatless meal. We make Pasta Primavera several times a year. I add different vegetables every time. This time I used vegetables that I had in the refrigerator. I was missing a frozen bag of peas but I highly recommend using peas in your Primavera. The beautiful thing about Primavera is you can make it so many different ways: butter/olive oil sauce, red sauce, Alfredo sauce, and so on. Our favorite is a light butter/olive oil base.

Ingredients:

  • 1 Bag of Spaghetti or any choice of pasta noodle (17.6 ounces)
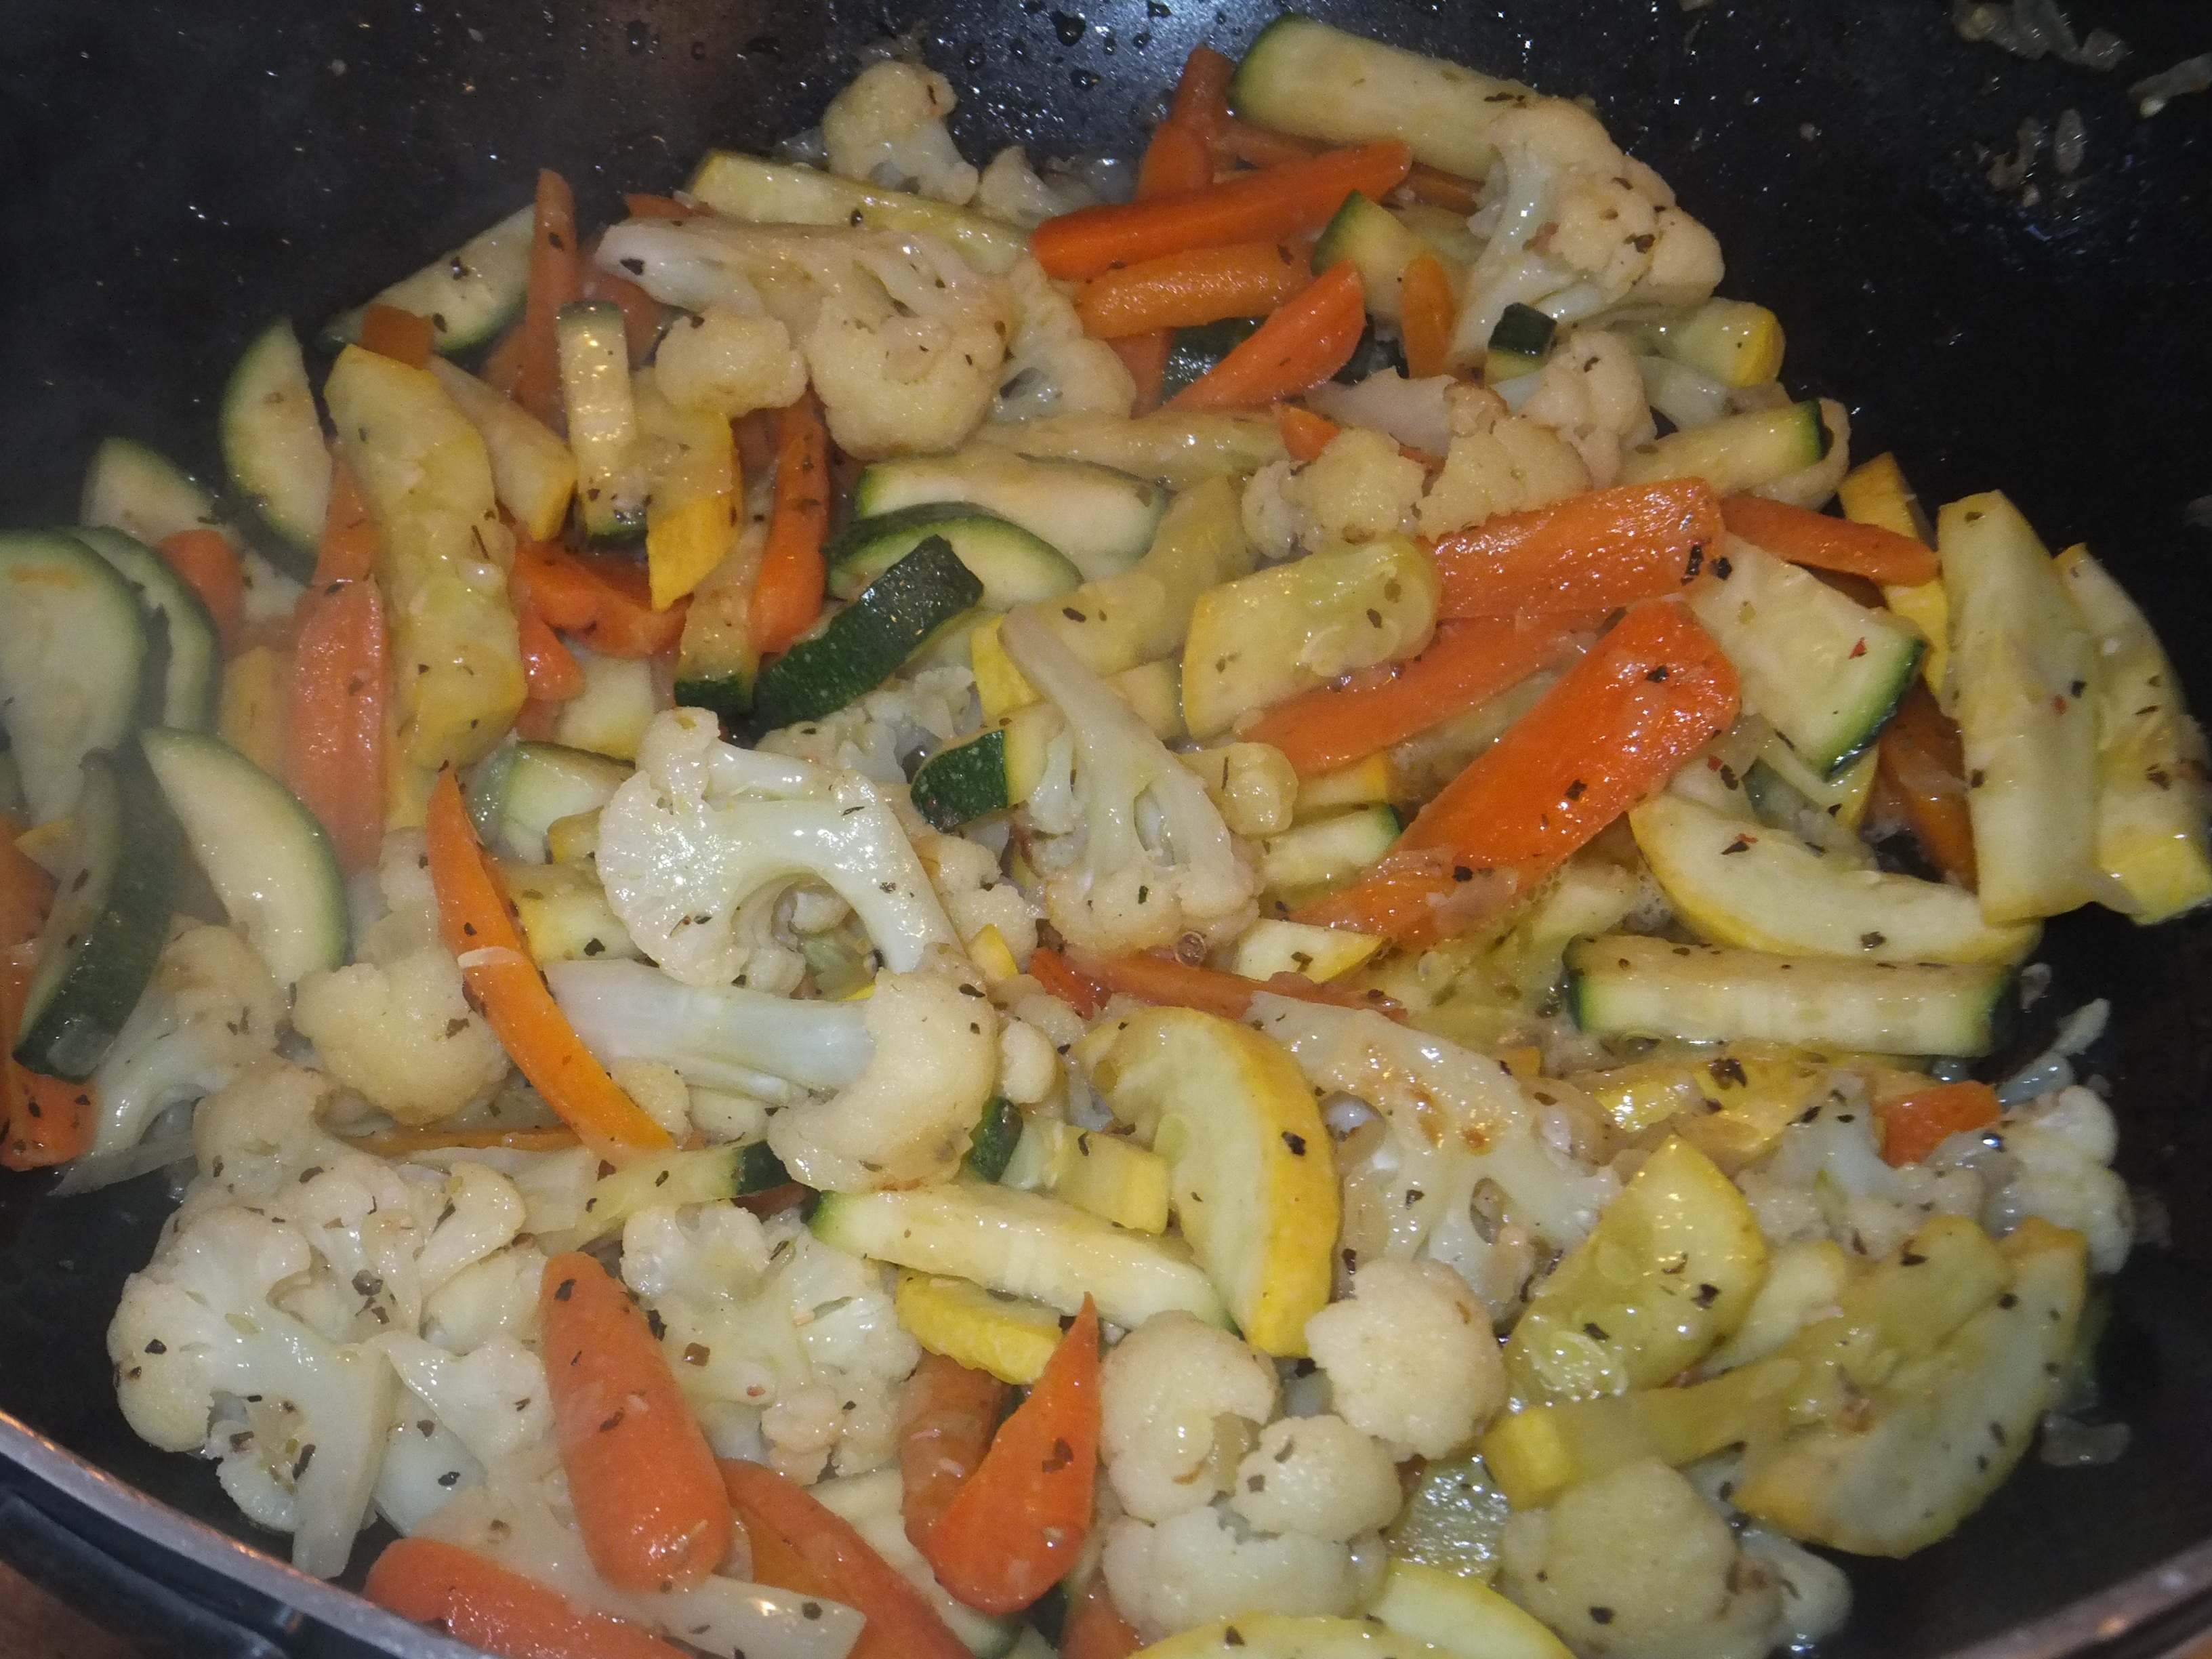
  • 3-4 Cups of Mixed Vegetables (cut carrots in match sticks, zucchini and squash in match sticks or quartered, and cut cauliflower)
  • 1 Medium Onion, chopped
  • 4 Garlic Cloves
  • 4-5 Tablespoons of Butter
  • 3 Tablespoons of Olive Oil
  • 1 Tablespoon of Italian Seasonings
  • Sea Salt and Fresh Pepper to taste
  • Dash of Cayenne or Crushed Red Pepper (optional)
  • Fresh Grated Parmesan Cheese

Directions:

  1. Prepare pasta according to directions.  Meanwhile, cut and prepare all vegetables.
  2. Heat the olive oil in a large wok or saucepan over medium to high heat. Add the onions and fresh garlic along with the cauliflower and carrots. Cook for 4-5 minutes.  Add the butter and the zucchini and squash. Cook for another 4-5 minutes or until vegetables begin to soften.
  3. Next, add the Italian seasonings, sea salt, pepper, and red pepper.  Add pasta to pan and toss lightly.
  4. Heat on low heat for 3-6 minutes or until heated through.
  5. Serve with fresh grated parmesan cheese.

Enjoy!

Cooked Vegetables
Pasta Primavera


Family, Food, Kids, Snacks

Stovetop Popcorn

Popcorn

I can’t remember the last time I had real homemade popcorn made on the stove. We have been eating microwave popcorn for so many years.  I guess because of the convenience, but I will never go back.  Plus, it’s not that healthy for you. In our house we limit the food we put into the microwave so this is yet another food item that will no longer be zapped.

Making popcorn on the stove may sound very easy, however there is a special trick to it.  If you don’t follow the directions below, there’s a good chance you will end up with burnt popcorn. The cooking method below also ensures that almost every kernel will pop too.

Ingredients:

  • 3 Tablespoons of Vegetable or Canola Oil
  • 1/3 Cup of Popcorn Kernels
  • 1 3-Quart Saucepan
  • 3 Tablespoons of Butter or More
  • Sea salt to taste

Directions:

  1. Heat the oil in a 3-quart saucepan over medium to high heat.
  2. Put 3-4 kernels in the oil and cover the saucepan.
  3. When the kernels pop, add the rest of the kernels to the pan in an even layer.  Cover and remove the pan from the heat for about 30-40 seconds. This method brings all the kernels to the same temperature so they will all pop at the same time.
  4. Return the pan to the heat. Keep the lid slightly ajar to let the steam release.  Popping should begin very soon and at the same time.  Listen carefully to the popping.  When there is a few seconds between pops, remove the pan from the heat, remove lid, and add the popcorn to a large bowl. Using this method ensures almost every kernel will pop and keeps it from burning.
  5. If you like buttered popcorn, add 3 Tablespoons of butter, more or less, depending on your preference to the empty saucepan.  The butter will melt very quickly.  Evenly pour the butter on your popcorn. Add sea salt to the popcorn.

Suggestions:

  • You can also get creative with some additional seasonings such as: pepper, cayenne, grated parmesan cheese (my favorite to add), melted chocolate, and so on.
  • Popcorn can also be used to make an awesome trail mix.

Enjoy!

Family, Food

Stuffed Green Peppers

Sievers Stuffed Peppers

There is nothing better than getting that “hand me down” recipe passed on from generations.  This stuffed pepper recipe is compliments of my awesome mother in law, Nancy Sievers.  I’ve been making this recipe for over 12 years. Making recipes from your childhood brings back so many fond memories so we agreed to have some recipes from each side of the family. It has worked out great!

This recipe is another favorite in this household.  I love it and my kids love it. Do my kids eat the pepper?  No, except my 10 year old, Jack, who has a very sophisticated palate.  He loves everything. He may not eat the entire pepper but he will eat a lot of it.  Heck, the best part of this recipe is the stuffing anyway.

It’s super easy to make.  You can even make these peppers in advance…refridgerate or freeze.  One key to this recipe is the last 15 minutes of cook time…make sure you do not forget to uncover and let them get a little browned on top, without drying out of course.

Ingredients:

  • 4 Large Green Peppers (prefer 4 lobes)
  • 2 Cups of Boiling Salt Water
  • 1 Can Tomato Sauce (8 ounces)
  • 1/2 Pound of Ground Beef
  • 3/4 Cup of Rice
  • 1 Teaspoon of Salt
  • 1/4 Teaspoon of Pepper
  • 1 Tablespoon or more of Chopped Onion
  • Dash of Crush Red Pepper (optional)

Directions:

  1. Heat oven to 350 degrees.
  2. Cut a thin circular slice from the stem of each pepper.  Wash inside and out, removing all seeds and membranes.
  3. Cook peppers in boiling water for 5 minutes.  Drain and cool.
  4. Mix all the other ingredients together in a large bowl.
  5. Stuff Peppers lightly with the meat mixture.  Stand upright in a baking dish.
  6. Cover and bake 45 minutes. Uncover peppers and bake another 15 minutes.

Stuffed peppers are not complete without ketchup!  I double this recipe every time I make it because it is so easy and we gobble it up every time.

Enjoy!

Stuffed Peppers Cooked
Family, Food, Kids, Snacks

Pretzel Rolo Snacks

Pretzel Rolo M&M's

I’m a huge fan of sweet and salty mixed together.  I love pretzels and I love Rolos!  Unfortunately I can’t take credit for this recipe, but I still wanted to share it with you because it’s so good and easy!  Plus, it’s always a big hit at any party and my kids always help out in the kitchen.

There are tons of different variations of these pretzel Rolo snacks floating around.  My all time favorite ones include the pecans on top, however my third child has a peanut and nut allergy so I do not get to indulge in those anymore.  I decided that there had to be something else I could use as my topper on these awesome snacks. I came across a few different options.  I must admit that these Pretzel Rolo M&M’s are just as good as the Pretzel Rolo Pecans. Plus, my little one can eat M&M’s with out any problems so it was good for all of us!

Ingredients

  • 2 bags of Rolo’s
  • 1 Bag of Pretzel Snaps ( can use regular pretzels but I prefer to use the Snaps)
  • 1 (12.60 oz.) Bag of M&M’s
  • Foil

Directions

  1. Place foil on baking sheets.
  2. Preheat the oven to 350 degrees.
  3. Place pretzels on foil until entire sheet is full approximately 1/2 inch in between.Nick making Rolo Pretzels
  4. Open all the Rolos and place in the center of each pretzel. I usually have the kids do this part because they love to pop a few in their mouth.
  5. Place the pretzels with the Rolos on top in the oven for 3 minutes. Remove from oven. Then add one M&M to each one and gently push down to spread the Rolo all over the pretzel.  I also take a few of them and make a pretzel sandwich by adding another pretzel on top instead of an M&M.
  6. Cool the pretzel snacks and then place in the refridgerater so they can set.

The best way to serve them is at room temperature.

Enjoy!

Stage 2
Stage 1